We explain some steps and methods by which you can quickly fix the Could not get lock /var/lib/dpkg/lock error, which is common in Ubuntu Linux.
Table of Contents
The Backstory
It happens more than you can imagine. One fine morning you boot up your shiny Ubuntu Linux and try to install something or upgrade your system. And you run into this error – "Could not get lock /var/lib/dpkg/lock ....".
Reason? The reason is simple and happens with the “Advanced Package Tool (apt)“. The apt package tool is busy doing other operations while you asked it to do something. When apt does some package operation, it creates a lock file to prevent this scenario. As per OS principle, a critical resource should be locked while performing system upgrades/updates so that no other process can access it. This is to prevent any unwanted system behaviour.
There are several variations of this error. But the root cause is the same as what I described above.
Here are some of the errors.
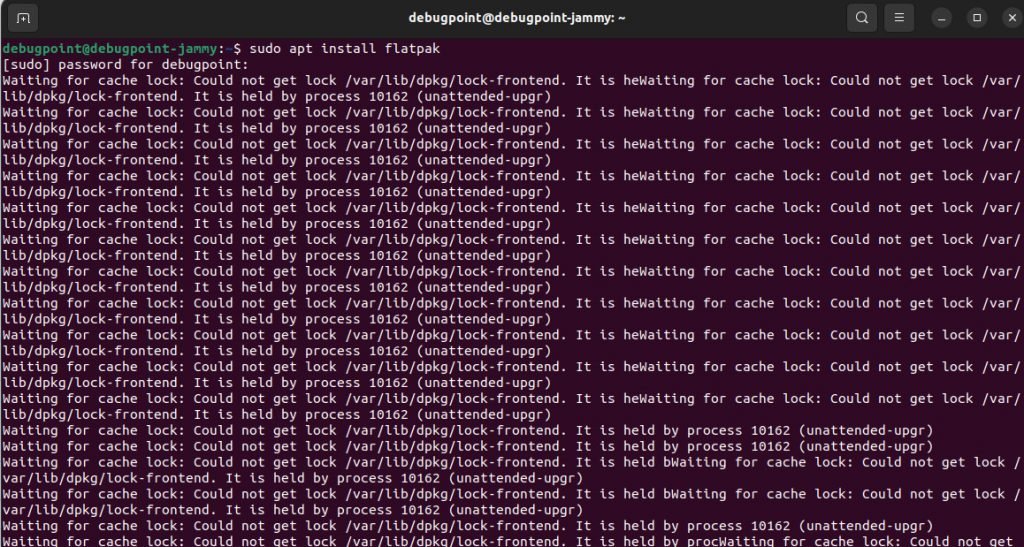
Some Sample Errors
E: Could not get lock /var/lib/dpkg/lock - open (11: Resource temporarily unavailable) E: Unable to lock the administration directory (/var/lib/dpkg/), is another process using it?
Waiting for cache lock: Could not get lock /var/lib/dpkg/lock-frontend. It is held by process 10162 (unattended-upgr)
E: Could not get lock /var/lib/apt/lists/lock - open (11: Resource temporarily unavailable)
E: Unable to lock directory /var/lib/apt/lists/
How to Fix: Could not get lock Error
Method 1 (recommended)
The safest and recommended way to fix this is to wait. Since the apt is running in the background, it’s better you wait for a few minutes. And then, you can try to perform the operation. Most of the time, it resolves the issue by letting the system take care of it.
Method 2
The second method is to remove the lock file manually. This requires admin privileges. Open a terminal prompt and run the following command to clear the lock.
After you run the command, try to perform the operation which caused the error. And you should be fine.
sudo rm -f /var/lib/dpkg/lock
Method 3
The third method is to manually find the process ID of apt, holding the lock and terminate it.
You can filter all the processes which have apt using the command below.
ps aux | grep apt

Once you do that, you can get the process ID (2nd column in the above image) and kill it using the following sample command.
kill -9 processnumber
Method 4
The fourth method is to disable the daily auto update check timer systemd service to try your operation. To do that, open a terminal and disable the service using the following command.
sudo systemctl stop apt-daily.timer
Now, reboot the system and try your operation. If you are all set and the error is gone, you can enable the timer service again using the following command. And you should be all set.
sudo systemctl start apt-daily.timer
Method 5
The final method is specific to additional errors which come with apt lock file.
If the error contains a line like – “E: Unable to lock directory /var/lib/apt/lists/”, then try the following command.
sudo rm /var/lib/apt/lists/* -vf
Finally, if nothing works, try cleaning the apt archive lock using the following command.
sudo rm -f /var/cache/apt/archives/lock
So, that’s all.
Wrapping Up
In this article, I have explained various ways to resolve this typical error in Ubuntu Linux and related distributions. I am sure any one of the methods should work for you.
Do let me know in the comment box which command worked out for you for the benefit of others.


